
It can't be overstated how crucial video codecs are to the products we use every day. Without them, we wouldn't be able to watch videos on YouTube or meet remotely via Zoom. But how do they work? In this post, we'll explore at a high level the key concepts and defining characteristics of video codecs. Then, to further demystify them, we'll even implement one from scratch in about a hundred lines of Rust.
What is a video codec?
Transmitting uncompressed video requires an immense amount of bandwidth. 8-bit 4K video at 60 FPS requires about 12 gbps of bandwidth to transfer uncompressed. If you want to deliver 4K video to consumers over the Internet, you're going to need to compress that down to about 50 mbps, which means you'll need a compression ratio of about 240:1 (which is extremely high).
A video codec is an algorithm which aims to compress video via one of two means:
- Eliminating redundant information
- Eliminating insignificant information that has a low impact on quality
Eliminating Redundancies
Spatial Redundancy
Generally images produced by cameras do not have much randomness in them. If you look at this image, it's easy to see that the blue pixels of the sky and water tend to be near other blue pixels:

Similarly, pixels near red pixels tend to be red. Video codecs rely heavily on this observation and exploit it via techniques such as:
- Intra Prediction – Intra prediction uses other pixels within the current frame to predict each pixel's color. Often the prediction is as simple as the average of the pixel to the left and the pixel above. After making predictions, codecs can encode the error (also known as the "prediction residual") instead of the full pixel value.
- Discrete Cosine Transform (DCT) – This technique is used by JPEG, H.264, H.265, ProRes, and many more. For an excellent overview of how it works, including MATLAB code, see Discrete Cosine Transform in Video Compression – Explain Like I’m 5. DCTs can be used to eliminate spatial redundancy losslessly, but usually are used for lossy codecs as quality can be degraded quite gracefully by dropping DCT coefficients.
Temporal Redundancy
In a video, subsequent frames are generally very similar to one another. Here are two subsequent frames from Cosmos Laundromat:

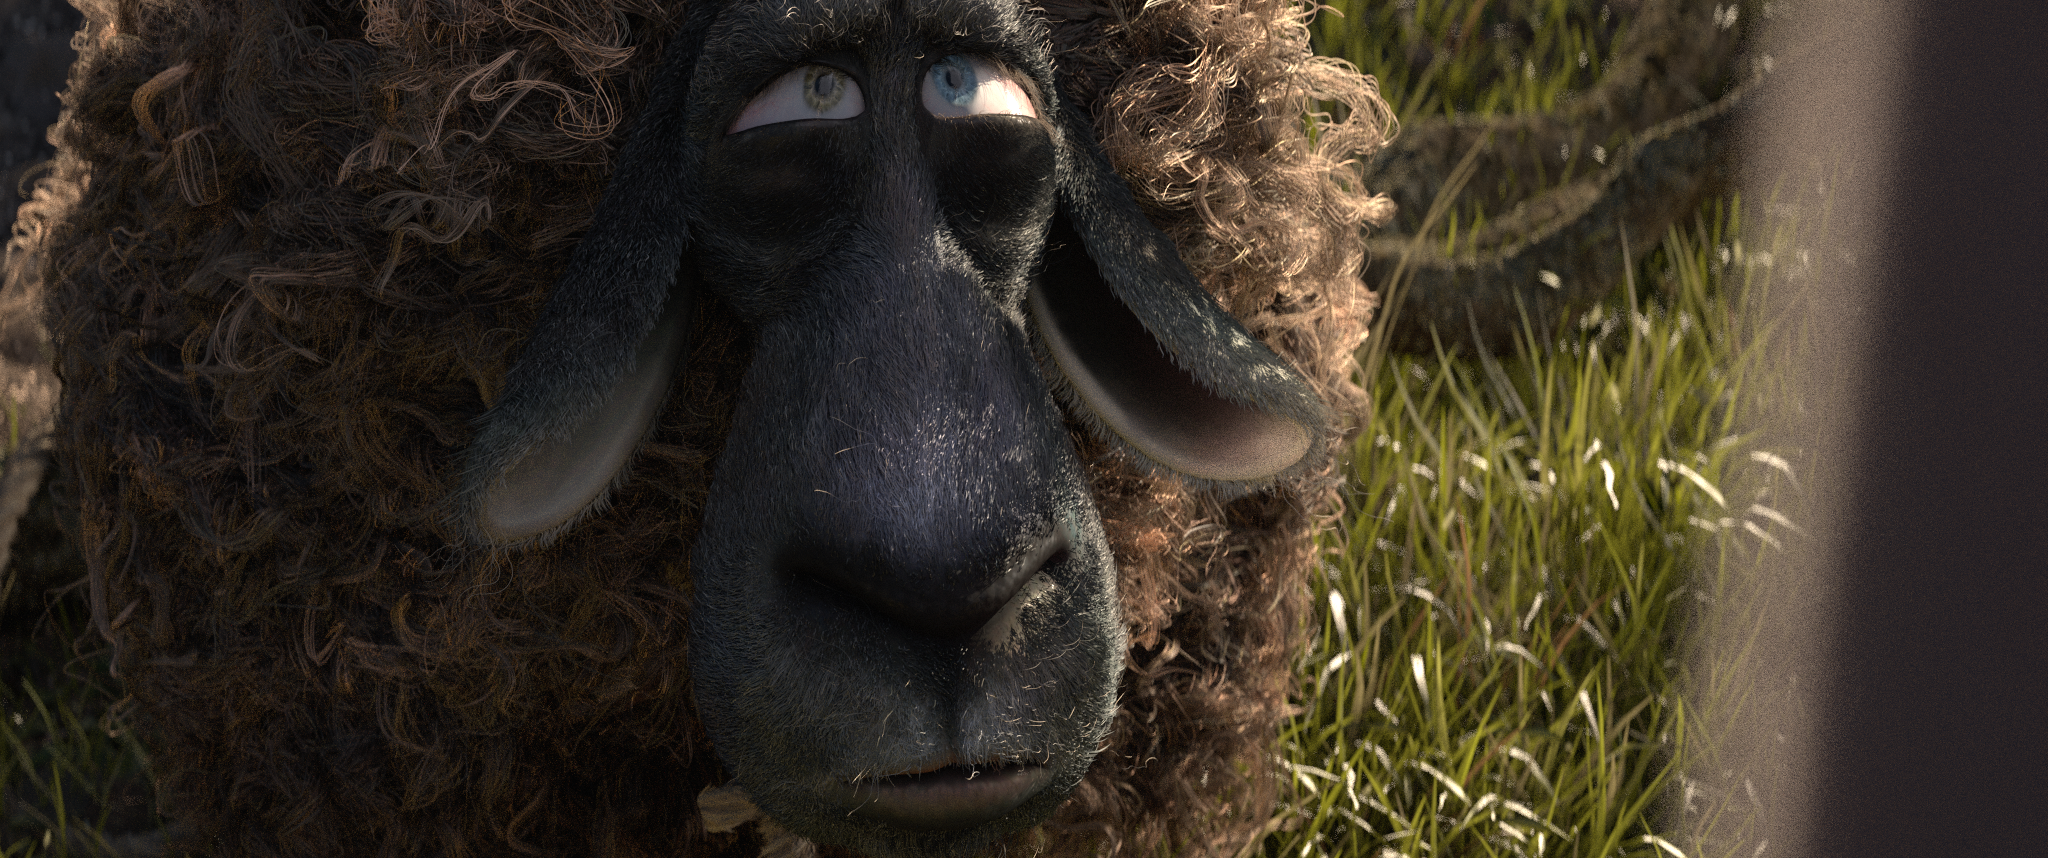
Pretty similar right?
By referencing data in past frames, video codecs can use inter-frame prediction techniques such as motion estimation in order to more accurately predict a pixel's value.
Coding Redundancy
Lastly, the way the data is serialized to bits is of utmost importance. Many codecs are designed such that values written to the bitstream are typically very small, making variants of Golomb coding very popular.
Eliminating Insignificant Information
Lossy codecs can also drop the less significant information to achieve compression goals. As a simple example, many codecs operate on YUV color, where it is very common to subsample the chroma components (the components that primarily determine the hue rather than the brightness of a pixel).
Codecs that utilize DCTs may simply drop coefficients until compression goals are reached.
Hello, Video Codec!
Now that we know about the basic concepts, let's see how some of them work together to form a fully functional lossless codec.
This codec will be an "intra codec". It will not attempt to eliminate temporal redundancies. It will operate on one frame at a time and only produce key-frames.
Furthermore, the codec will operate on each channel independently. So the input to our encoder will just be a single plane, defined like this:
pub struct Plane<T> {
    pub data: T,
    pub width: usize,
    pub height: usize,
    pub sample_stride: usize,
    pub row_stride: usize,
}
Our encoding and decoding processes will consist of two steps:
- Predict what the next pixel will be (Intra Prediction).
- Code the prediction residual via Rice coding (a type of Golomb coding).
Intra Prediction
We'll iterate through pixels in raster order and use the surrounding pixels for prediction. There is a relatively standard notation for the surrounding pixels, which looks like this:
We will use the fixed prediction function that LOCO-I uses:
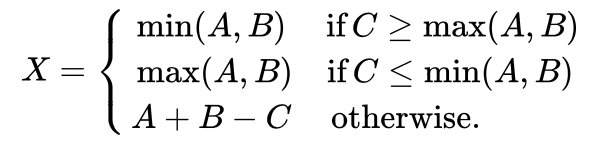
pub fn fixed_prediction(a: u16, b: u16, c: u16) -> i32 {
    let min_a_b = a.min(b);
    let max_a_b = a.max(b);
    if c >= max_a_b {
        min_a_b as _
    } else if c <= min_a_b {
        max_a_b as _
    } else {
        a as i32 + b as i32 - c as i32
    }
}
The prediction residual for each pixel is simply X minus the prediction. So if our predictions are any good, the prediction residuals will be very small numbers.
Let's see what they look like for this 4K frame from Tears of Steel, obtained from the wonderful collection of test media at xiph.org:

If we visualize the cube root of the prediction residuals, they look like this:

The image is pretty dark. In fact, if you visualize the raw prediction residuals, the image looks almost completely black. This is perfect because we can code the small prediction residuals in much less space than the raw pixel values.
Coding the Prediction Residual
To ensure that small numbers take up minimal space, we'll use Rice coding. A simple Rust implementation looks like this:
pub fn encode_value<T: Write>(k: u32, x: i32, dest: &mut BitstreamWriter<T>) -> Result<()> {
    let x = ((x >> 30) ^ (2 * x)) as u32;
    let high_bits = x >> k;
    dest.write_bits(1, (high_bits + 1) as _)?;
    dest.write_bits((x & ((1 << k) - 1)) as _, k as _)?;
    Ok(())
}
An important aspect of Rice coding is that it has two inputs: a parameter k and the number to be encoded. A small parameter k makes small numbers require less space and big numbers require more space. A large parameter k makes small numbers require more space and big numbers require less space. We're going to want a small k when we're confident that our prediction is accurate and a larger k when we're not so confident. This parameter has to be known by the decoder, so it can't rely on knowing the true value of the pixel being encoded – it can only depend on the values of the previous pixels.
pub fn k(a: u16, b: u16, c: u16, d: u16) -> u32 {
    let activity_level =
        (d as i32 - b as i32).abs() + (b as i32 - c as i32).abs() + (c as i32 - a as i32).abs();
    let mut k = 0;
    while (3 << k) < activity_level {
        k += 1;
    }
    k
}
In this function, we make k small when the surrounding pixels are similar to each other and large when there's a lot of "activity".
All Together
All that's left is to scan through the pixels and use the above functions to write out the bitstream:
fn encode<T: AsRef<[u16]>, W: Write>(plane: &Plane<T>, dest: W) -> Result<()> {
    let mut bitstream = BitstreamWriter::new(dest);
    let data = plane.data.as_ref();

    let mut b = 0;
    for row in 0..plane.height {
        let mut a = 0;
        let mut c = 0;
        for col in 0..plane.width {
            let x = data[row * plane.row_stride + col * plane.sample_stride];
            let d = if row > 0 && col + 1 < plane.width {
                data[(row - 1) * plane.row_stride + (col + 1) * plane.sample_stride]
            } else {
                0
            };

            let prediction = fixed_prediction(a, b, c);
            let prediction_residual = x as i32 - prediction;

            encode_value(k(a, b, c, d), prediction_residual, &mut bitstream)?;

            c = b;
            b = d;
            a = x;
        }
        b = data[row * plane.row_stride];
    }

    bitstream.flush()
}
Easy! The decode function just does the inverse. See the GitHub repository for runnable code, including the decode function.
Comparisons
This codec is so simple it can't possibly be any good, right? Let's find out!
We'll test on the above 4K frame from Tears of Steel, which uses 16-bit RGB color, requiring 42.1MB of space if uncompressed.
If we compress it using our codec, we get it down to 25.5MB. Generally 2:1 is a pretty typical ratio for lossless compression so this isn't bad at all.
In fact, if we losslessly convert it to a PNG (which is based on DEFLATE), even after pngcrushing it to death, it only compresses to 31.5 MB. For this image, our codec outperforms PNG!
And lastly, if we losslessly convert it to JPEG 2000 (which is based on Discrete Wavelet Transforms), it compresses to 23.1MB. So for this image, our "hello world" codec is already pretty close to JPEG 2000!
Our codec already has pretty reasonable compression, but it also has one more thing going for it: It's insanely low complexity, meaning it's incredibly fast!
Next Steps
Now that we have a working codec, what can we do to improve it?
- Coding Optimizations – The naive Rice coding above has a flaw: When we're confident in our predictions, but end up being completely wrong, we end up writing values using an obscene number of bits. With a simple trick, we could put an upper bound on the number of bits used for each value. It's also possible to further constrain the range of the values being written using modulo operations.
- Context Modeling – As the encoder makes predictions, it's possible to have it learn from its mistakes and apply corrections to later predictions.
- Prediction Residual Transforms – The prediction residuals themselves can be compressed using other techniques such as DCTs.
- Machine Learning? – There are many groups investigating the use of machine learning as a way to improve efficiency, e.g. with more accurate predictions. ML-based codecs are still far from reaching the mainstream, but early results such as those by WaveOne are promising.
If you like working on this sort of thing, come join us at Tempus Ex and get paid to do things like this.